Wow, almost a year since my last post. I have been busy with work and moving slowly with this project. But I have finally finished the headstock and tailstock.
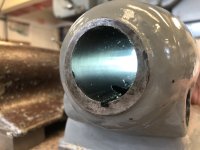
Step one was restoring the tailstock quill. First step was to hone the bore. Easier said than done, I don't have a Sunnen hone and none of the shops I called would take the job. One machinist was very helpful but he didn't have a long enough mandrel. After callling a couple dozen others, I decided to just buy my own mandrel and take it back to the helpful guy. But then he was too busy! After waiting for a while, he agreed to let me rent some time on his hone. It was the first time I've used one, they are fantastic machines. I hit a tenth on diameter over the length of the bore.

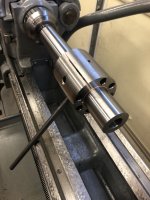
Next was to make a new quill. Which was a failure. I was unable to get the taper concentric to the OD. I was using my old SB10L, without a taper attachment. So instead I just made a simple test bar so that I can move forward with the alignment. I cut a 60º point at one end and roughed the OD. Then I made a lap and lapped the OD to about .0003-.0005" smaller than the bore. For whatever reason I found it harder to hit the diameter lapping than with honing.


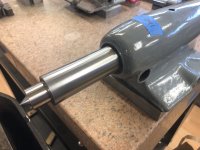
Once I had a makeshift quill I scraped the tailstock to alignment. When finished it was about .010" lower than the headstock. Not bad. So I decided to go ahead and remove .010" from the headstock rather than shim the tailstock.
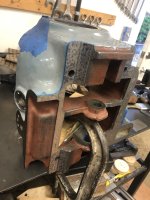
Scraping the headstock was a huge pain in the ass. Well over a hundred cycles. The SOB is 75 lbs, not fun to carry back and forth to the lathe for spotting. And the only way I could mount it to the bench was on its back, and scraping vertically is always uncomfortable.
I really dislike the prismatic ways. If the angled ways are loose the HS/TS won't locate accurately. If the angled ways are slightly tight then the ways will splay outwards when it's clamped down. Even when it spots perfectly, it will tighten up when clamped down the ways splay outwards a couple tenths. The angled ways have to be just very slightly loose to get it perfect. Now that I've finished this, I really think the standard vee plus flat configuration is superior.
After some back and forth, I finally got everything finished. HS spindle points upwards .0002"/12", forwards .0001"/12". TS quill points upwards .0004"/4", forwards .0003"/4". And the TS is .0003" higher than the HS. Perfect. Yeah, some folks like the TS to be higher, but it's in spec and I'll be damned if I'm going to spend another minute scraping that headstock. Done.


With the headstock dropping about .010", there were some gears that needed to be adjusted too. There is a backgear pinion underneath the headstock. It was easy enough to remove some material from the mounting surface to drop it to the correct height. There is also the rear headstock assembly with the leadscrew-reverse gearing, and it had to be dropped about the same amount as the headstock. I milled most of it and scraped to fit. In both cases I ended up with .005" backlash on the gears, a bit more than I wanted but good enough.

It's nice to be done with this part. If work cooperates, maybe I'll finish in 2023.


