What's new
What's new

Purchasing a Hendey lathe

Sumo91

Aluminum
Joined
Feb 8, 2022
Location
Houston
Shot in the dark here. Does you new baby not have an oil bath in the apron?

It does have the oil reservoir in the apron that pumps oil to the ways. It had a little oil in it whenever I got it. I topped it off with a mixture of mineral spirits and gear oil for now. I gotta take it off it and completely clean and inspect all the internals, but that will have to wait for awhile for a few reasons.
 

Sumo91

Aluminum
Joined
Feb 8, 2022
Location
Houston
Alright, it's been awhile but I'm back to working on the lathe. I got the apron removed, cleaned up really good, and all looks great except for a couple of things.

First thing. The half nuts are completely shot. I'll need to pour new ones or get new ones, any info for repouring the babbitt half nuts along with what material I should use would be appreciated.

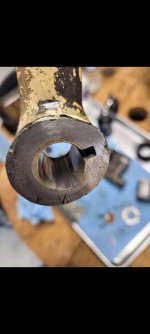
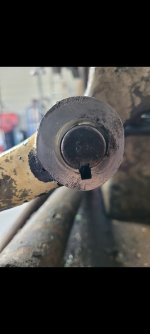
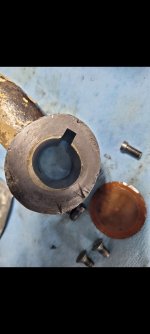
Second thing. The apron reverse handle and the clutch hand lever, both handles have egg shaped holes, I'm thinking about reaming them out and fitting a bronze bushing in place with the keyway cut out. It's looks like the insides of the hole have been brazed before, it it an old worn out bushing. Hard to tell. Any advice on this issue?Screenshot_20221025-093359_Gallery.jpgScreenshot_20221025-093407_Gallery.jpgScreenshot_20221025-093417_Gallery.jpgScreenshot_20221025-093840_Gallery.jpgScreenshot_20221025-093843_Gallery.jpg
 
Last edited:

M.B. Naegle

Titanium
Joined
Feb 7, 2011
Location
Conroe, TX USA
My Hendey has some wear in the same handle, though not as bad. pressing in a bushing is a good way to do it, however the trick is that you'll need to bore it out large enough that the new keyway doesn't cut the wall out of the new bushing, turning it into a 'C' shape, because then it won't want to stay pressed in the bore.

It looks like someone might have poured brass in the hole before (?). I've never done that but I suppose it would work as the C-shaped section would be bonded to the iron. Another repair option would be to fill the void with Babbitt when you do the half-nuts. You'll want to cook all the oil out of it so the Babbitt can bond to the metal and it would also help to grind or score some grooves into the walls to help lock the metal in place. It would likely be best to melt the brass out of it too. I wouldn't be surprised if it had a Babbitt liner when new from the factory as they did it on other things like bed-clamps that would drag along with the carriage.

With the nuts, there's lots of good information out there on pouring them. One thing to note is that the keyway cut along your lead-screw won't agree with a babbit pour, as you don't want that keyway reflected in the nuts, and you need to do them together so they line up perfectly. My old nuts had the Babbit stripped out of them and I was going to re-pour them until I lucked into a good used set. My plan was to cut a short dummy lead screw without the keyway to use in place of the actual lead screw. I got the thread mostly cut before my DIY ground Acme threading bit broke, and I just hadn't needed to finish it yet.

Babbitt Thread
(here's the thread I started awhile back).

I've got all the stuff to pour Babbitt, minus finishing the dummy screw, so if you'd like we can meet up sometime and have some fun with the oxy-acetylene :cheers: . I'd still like to pour my old nuts to have a spare set and I have some bearings to do as well.
 

Sumo91

Aluminum
Joined
Feb 8, 2022
Location
Houston
Thanks for the info! I actually read your post on pouring babbit. I'm no longer in Houston, we moved to TN not long after I got the Hendey, so that's why I haven't been posting about it.

Ive got alot of stuff disassembled at the moment, just getting stuff degreased and cleaned up, making sure everything is in good shape, etc before firing it up. Id like to remove the pulley from the rear spindle, and the cast piece directly behind it. I just dont wanna fidget with the clutch or mess up anything that is already set up correctly.

I'm also thinking about getting a couple cans of rattle paint to make it look decent for now, while I have it apart and getting it degreased. Just until i can completely tear it down for a semi restoration


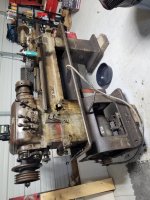
here is the pulley im wanting to pull off (also, does that alemite/zerk fitting take grease or oil?)

Screenshot_20221027-111631_Gallery.jpgScreenshot_20221027-111430_Gallery.jpgScreenshot_20221027-111859_Gallery.jpgScreenshot_20221027-111906_Gallery.jpg
My Hendey has some wear in the same handle, though not as bad. pressing in a bushing is a good way to do it, however the trick is that you'll need to bore it out large enough that the new keyway doesn't cut the wall out of the new bushing, turning it into a 'C' shape, because then it won't want to stay pressed in the bore.

It looks like someone might have poured brass in the hole before (?). I've never done that but I suppose it would work as the C-shaped section would be bonded to the iron. Another repair option would be to fill the void with Babbitt when you do the half-nuts. You'll want to cook all the oil out of it so the Babbitt can bond to the metal and it would also help to grind or score some grooves into the walls to help lock the metal in place. It would likely be best to melt the brass out of it too. I wouldn't be surprised if it had a Babbitt liner when new from the factory as they did it on other things like bed-clamps that would drag along with the carriage.

With the nuts, there's lots of good information out there on pouring them. One thing to note is that the keyway cut along your lead-screw won't agree with a babbit pour, as you don't want that keyway reflected in the nuts, and you need to do them together so they line up perfectly. My old nuts had the Babbit stripped out of them and I was going to re-pour them until I lucked into a good used set. My plan was to cut a short dummy lead screw without the keyway to use in place of the actual lead screw. I got the thread mostly cut before my DIY ground Acme threading bit broke, and I just hadn't needed to finish it yet.

Babbitt Thread
(here's the thread I started awhile back).

I've got all the stuff to pour Babbitt, minus finishing the dummy screw, so if you'd like we can meet up sometime and have some fun with the oxy-acetylene :cheers: . I'd still like to pour my old nuts to have a spare set and I have some bearings to do as well.
 

M.B. Naegle

Titanium
Joined
Feb 7, 2011
Location
Conroe, TX USA
Ah, well no problem. The tools/materials to pour Babbitt are not hard or expensive to find IMO. You might double check if your leadscrew is the same 1 1/4" 6TPI Acme thread as mine, but if it is, let me know when you're ready and I'll loan you my dummy screw section.
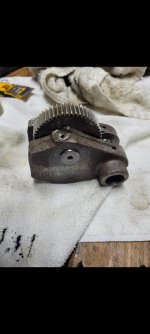
 

Sumo91

Aluminum
Joined
Feb 8, 2022
Location
Houston
Ah, well no problem. The tools/materials to pour Babbitt are not hard or expensive to find IMO. You might double check if your leadscrew is the same 1 1/4" 6TPI Acme thread as mine, but if it is, let me know when you're ready and I'll loan you my dummy screw section.
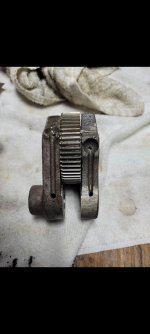
I sure appreciate the offer! I'll definitely take you up on it whenever the time comes
 

Sumo91

Aluminum
Joined
Feb 8, 2022
Location
Houston
Disassembly and cleaning is still going good. I have the QCGB torn apart and almost cleaned up. Gonna go ahead and strip, paint, and polish all related parts for it since I have it apart, I definitely don't wanna take it apart again.

I'm having trouble removing the gear in the picture below (its the where the brass handle attaches to the QCGB). Ive tried hammering and pressing out the gear shaft, no luck. The shaft spins freely inside the housing. The gear is attached to the shaft somehow. I can't figure it out. No keyway, set screws, etc. Just oil holes. Any help would be appreciated.Screenshot_20221101-074302_Gallery.jpgScreenshot_20221101-074315_Gallery.jpgScreenshot_20221101-074322_Gallery.jpg
 

Sumo91

Aluminum
Joined
Feb 8, 2022
Location
Houston
Mine is similar. Shaft is press fit in the gear. Why do you have to take it out?
I can feel there is some kind of resistance/catch when spinning the gear. Nothing bad, but I'd like to get it apart and cleaned, inspected, etc.

I'm so far into tearing it down now that I'm probably gonna get it prepped for paint and slap a few coats on pieces as I go, I have the time available to do it now, and i may not have that free time available again in the future. But everything looks good mechanically so far. I'm taking tons of pictures, and I'm hoping I'll be able to write up a few guides on assembly/disassembly of certain things with lots of photo references with clean parts.
 

Sumo91

Aluminum
Joined
Feb 8, 2022
Location
Houston
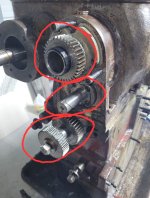
I would like to remove a few things from the headstock as pictured below, and I'm not quite sure how to go about it. I would like to remove the top gear, and the shaft in the middle that is held on by 4 bolts. I believe I'll be able to remove the bottom gear assembly when I remove the headstock. I don't plan on removing anything internally from the headstock because I don't want to mess with bearing clearances or anything else that might be set up or aligned a certain way, so if that is the case with some of the stuff I want to remove than I'll just work around it. Screenshot_20221105-084303_Gallery.jpg
 

skipd1

Cast Iron
Joined
Jan 6, 2010
Location
Bismarck, ND
The top gear on your spindle should just pull straight off as its keyed. At least that's how mine did on my 12x30 18 speed. The bottom gears, the outside one will come off but the inside is attached to the shaft and you have to pull the headstock to get at that. Pulling the head stock isn't as bad a job as you might think.
 

Sumo91

Aluminum
Joined
Feb 8, 2022
Location
Houston
Got the bottom of the head stock done. Cleaned, painted, every moving part inspected, degreased, oiled, and put back together. I'm really happy with the results. Screenshot_20221113-114827_Gallery.jpgScreenshot_20221113-115023_Gallery.jpgScreenshot_20221113-114737_Gallery.jpgScreenshot_20221113-114549_Gallery.jpgScreenshot_20221113-114852_Gallery.jpg
 

johnoder

Diamond
Joined
Jul 16, 2004
Location
Houston, TX USA
So there are different versions for the lead screw reverse?

I take it the "Synchromesh" is referring to little engagement clutches as pictured below?

View attachment 379304
I am guessing here, but the "old" Hendeys just had single tooth "dog" clutches that engaged with a minor thump if going slow and much more audible BANG if going too fast
The "synchromesh" is a term borrowed from the auto industry to identify that certain cars had the feature in their transmissions after about 1932 to ease the transitions occurring when "shifting gears": - and this involves the use of frictional elements that help the shifting. To somewhat illustrate, this 1930 Packard of mine had a four speed transmission with no synchromesh at all - and every body referred to them as Crash Boxes. You could shift them, but always with more or less noise and/or difficulty
 

Attachments

  • 03.jpg
    03.jpg
    84 KB · Views: 2

hendeyman

Stainless
Joined
Nov 18, 2005
Location
elfrida arizona usa
Sumo91:

What you have posted is he High Speed Reversing Mechanism. First introduced as an externally mounted attachment in 1910
and produced until 1915. Reintroduced in 1937 as an internally installed attachment and later as a standard item, available on
most Hendey lathes.

Hendeyman
 

Sumo91

Aluminum
Joined
Feb 8, 2022
Location
Houston
Sumo91:

What you have posted is he High Speed Reversing Mechanism. First introduced as an externally mounted attachment in 1910
and produced until 1915. Reintroduced in 1937 as an internally installed attachment and later as a standard item, available on
most Hendey lathes.

Hendeyman
That's really interesting. I'll be needing some drawings sometime in the future for a few parts, ill give you a call once I get a complete list together of what I need.


Top