What's new
What's new

Measured Thermal Expansion of a 1.25" dia by 10" long Steel Bar in Response to Bare Hand Contact

dgfoster

Diamond
Joined
Jun 14, 2008
Location
Bellingham, WA
Baja,
I hear what you are saying and agree on unnecessary overdesign or overspecification, but the points I was trying to make were:
  1. When you can easily insulate the gripping surface of such a tool, it seems like cheap insurance to do so.
  2. Even if the movement is tiny, it could still potentially have a non-linear influence on the curvature of a reference surface.
  3. Large differences in surface area and cross section in sub structures of a design are going to make it more sensitive to thermal disparities.
I don't think I'm advocating anything extreme here, I get that you are saying you want to see evidence before taking any of these actions, I agree about wanting evidence, but in absence of it, conservatism seems wiser. Maybe you're right that in normal use this won't matter, I don't think the experiment above is proof enough, maybe we disagree on that. But if a manufacturer is going to pursue aesthetic design of a reference instrument (a worthy goal) over more simplistic or proven alternatives, I suggest they have some duty to know that it won't compromise the function. The actual device in question has a lot going on and may react unexpectedly or unintuitively. Testing with an actual casting, or the 1/2 sized prototype unit would likely provide better answers, and I think everyone will be pleased if it is proven to be stable even when handled without so much concern.
Baka, I completely agree with everything you said. I am relieved that the tone of my last post did not cause some unfortunate dust-up.

And I agree that your suggestion that the actual full-sized model should be tested as measuring one element of a system while ignoring other elements can have some unexpected outcomes.

But, in designing this piece I had to start somewhere and at least get a real-world-based sense of whether the design could be reasonably expected to work well as envisioned or should I modify it from the get-go due to stability concerns. I think the far from ”proven” observations suggest it is reasonable to proceed with the design as previously shown. ( I am continuing to make relatively minor aesthetic changes as personal taste dictates.).
I do intend to eventually set up a machined full-sized part and see if it is stable enough (see Memphisjed’s post) for day-to-day use as previously outlined. That will be the final arbiter—-real world, reasonably well described, and reasonably instrumented bench testing.

Denis
 
Last edited:

dgfoster

Diamond
Joined
Jun 14, 2008
Location
Bellingham, WA
By the way, if someone had a .00002 indicator they would be willing to bubble wrap and put in a flat rate box for short-term loan, I'd welcome it. Otherwise, when test time comes, I will use the Federal and set up a good large-faced Starrett .001" DTI and watch them to see they indicate comparable results.

Denis
 

dgfoster

Diamond
Joined
Jun 14, 2008
Location
Bellingham, WA
BTW, I did get a nice offer from a contributor here for use of a high-resolution (I think .00002") electronic indicator. So, before too long, I should have some more information to post. It may be a week or two before I have a full-sized casting made as I am waiting on a new resin printer and the weather has been unusually cold and will be for the next ten days. The resin printer will make a much cleaner core box. I plan to cast half-scale and full-scale versions of this angle plate.

I am anxious to actually grab a full-size plate strut and directly measure deflection of the vertical surface.

I guess no one has chucked up a 10” bar and measured length changes due to hand contact? It seems like replicating the test and confirming or denying the previously reported results would be helpful.

Denis
 

JST

Diamond
Joined
Jun 16, 2001
Location
St Louis
Here is my contribution:

3/4" diameter steel bar (no certs), 9" long overall, approximately 8" not held in chuck. Same basic procedure, hand held the bar in approximate middle for 35 seconds between pic 1 and pic 2. Temp 68 deg F, 30/31% RH per VWR Scientific temp/RH meter. Bar etc in equilibrium with surroundings before measurement. No disturbance of indicator needle when hand removed.

EDIT: The reading returned to zero after sitting some time. I left it for 2 or 3 hours, and have no idea how long it took.

I did check after 20 minutes, and it was still indicating over half the original expansion.

The two pics should be pretty self explanatory

bwKemYs.jpg


6sTglLt.jpg
 
Last edited:

dgfoster

Diamond
Joined
Jun 14, 2008
Location
Bellingham, WA
Here is my contribution:

3/4" diameter steel bar (no certs), 9" long overall, approximately 8" not held in chuck. Same basic procedure, hand held the bar in approximate middle for 35 seconds between pic 1 and pic 2. Temp 68 deg F, 30/31% RH per VWR Scientific temp/RH meter. Bar etc in equilibrium with surroundings before measurement. No disturbance of indicator needle when hand removed.

The two pics should be pretty self explanatory

bwKemYs.jpg


6sTglLt.jpg
Definitely in the ball park of my readings given the fact that a 3/4" bar had just a little over 35% of the mass/cross sectional area of the 1.25" bar. (Also, you may have a hotter hand!)

Thank you for posting this. Real world observations are so helpful!

Denis
 

dgfoster

Diamond
Joined
Jun 14, 2008
Location
Bellingham, WA
Some new data points using a mu checker for more refined measurements:

First I’d like to thank CarbideBob for loaning me a mu checker so that I can get more refined data. I thought that offer was extremely generous given the risk of shipment and the possibility of damage to his instruments. (His packaging was superb.). He sent me a private message offering to let me use his equipment and also gave me a new federal tenths measuring electronic gauge. I owe Bob my gratitude and, since this data collection has some benefit for all, I‘ll extend him a thanks from the forum in general.

The mu checker allows me to clearly see 10 millionth changes and interpolate one or 2 millionth changes in the length of the bar set up as outlined at the beginning of this thread.

I’ve made only a half dozen formal observations so far but here are a few of them:

At 65 to 70° in my shop with the temperature pretty well equilibrated grasping the bar in the center and holding it with a firm full grip with a bear hand results in a 1/10 lengthening of the bar in about 90 to 120 seconds.

At 45° a full grip with a warm hand resulted in a tent lengthening in about 35 seconds.

At 45° ambient and using a gardenGloved hand, I observed essentially no change in balance after 90 seconds.

in all cases once I removed by hand from the bar there was very slow return toward zero. This was expected but it was nice to see changes actually occurring as you might expect as it tends to validate the measuring technique and validate common sense thinking about the conditions.

As this entire thread relates to the design of an angle plate that has a strut. I will be Eventually making measurements on that angle plate using a bear hand a gloved hand a rag and cord wrapping the strut. Based on what I’ve seen so far I think it is reasonable to expect that simply using a common garden glove to insulate the hand from the actual measuring tool that virtually no heat transfer occurs I also strongly suspect that simple cord wrapping the strut will insulate it as well. And I think the implications for other measuring tools that we use are pretty obvious.

My shop is wood-stove-heated and, so, temps can swing pretty fast when I start a fire in the morning. That seems to have less effect than I expected. Even though my EE lathe. has immensely more mass than the bar and the bar has far more surface area per unit mass, the length change due to temperature change seems to occur very very slowly in the set up and is ten to 100 times less rapid than hand contact.

There will be more observation to post.
Again, thank you Carbidebob for your trust and generosity.

Denis
 
Last edited:

pat pounden

Aluminum
Joined
Jul 4, 2019
Some new data points using a mu checker for more refined measurements:

First I’d like to thank CarbideBob for loaning me a mu checker so that I can get more refined data. I thought that offer was extremely generous given the risk of shipment and the possibility of damage to his instruments. (His packaging was superb.). He sent me a private message offering to let me use his equipment and also gave me a new federal tenths measuring electronic gauge. I owe Bob my gratitude and, since this data collection has some benefit for all, I‘ll extend him a thanks from the forum in general.

The mu checker allows me to clearly see 10 millionth changes and interpolate one or 2 millionth changes in the length of the bar set up as outlined at the beginning of this thread.

I’ve made only a half dozen formal observations so far but here are a few of them:

At 65 to 70° in my shop with the temperature pretty well equilibrated grasping the bar in the center and holding it with a firm full grip with a bear hand results in a 1/10 lengthening of the bar in about 90 to 120 seconds.

At 45° a full grip with a warm hand resulted in a tent lengthening in about 35 seconds.

At 45° ambient and using a gardenGloved hand, I observed essentially no change in balance after 90 seconds.

in all cases once I removed by hand from the bar there was very slow return toward zero. This was expected but it was nice to see changes actually occurring as you might expect as it tends to validate the measuring technique and validate common sense thinking about the conditions.

As this entire thread relates to the design of an angle plate that has a strut. I will be Eventually making measurements on that angle plate using a bear hand a gloved hand a rag and cord wrapping the strut. Based on what I’ve seen so far I think it is reasonable to expect that simply using a common garden glove to insulate the hand from the actual measuring tool that virtually no heat transfer occurs I also strongly suspect that simple cord wrapping the strut will insulate it as well. And I think the implications for other measuring tools that we use are pretty obvious.

My shop is wood-stove-heated and, so, temps can swing pretty fast when I start a fire in the morning. That seems to have less effect than I expected. Even though my EE lathe. has immensely more mass than the bar and the bar has far more surface area per unit mass, the length change due to temperature change seems to occur very very slowly in the set up and is ten to 100 times less rapid than hand contact.

There will be more observation to post.
Again, thank you Carbidebob for your trust and generosity.

Denis
hell-use the WHOLE bear and lets see what that does!
 

dgfoster

Diamond
Joined
Jun 14, 2008
Location
Bellingham, WA
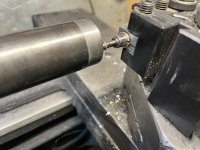
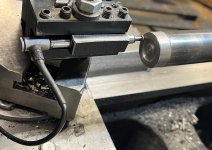
My PC is limping right now so posting images is a bit more trouble as posting using my iPad is just not as convenient or good. But here are a couple pics of the setup I am using for these tests of thermal expansion. Putting the LVDT probe in a fabricated slit bar with a through hole and putting that in the toolholder makes a pretty solid and easily-adjusted setup.

Setup for measuring exansion.JPG
Probe in toolholder.JPGProbe in toolholder2.JPG

This arrangement seems very solid and stable. I did a few more observations during the day yesterday as I worked on the patttern for the angle plate and did some prepping on the 48" flasks so that I can convert the 48 split pattern to a match plate. The thermal results were comparable to those posted in the above note.

Denis
 

CarbideBob

Diamond
Joined
Jan 14, 2007
Location
Flushing/Flint, Michigan
Glad to be of help to a BIG contributing person on PM with knowledge.
You did not mention my puck-up of sending the box to the wrong address.
Probe has been ridden hard, put up wet and I did not calibrate it so there could be some small percentage error.
Before some jump in this is not a mu-checker. It is a mini-checker.
For the curious the above pic shows a reading of 10 millionths undersized.
Bob
 
Last edited:

dgfoster

Diamond
Joined
Jun 14, 2008
Location
Bellingham, WA
Glad to be of help to a BIG contributing person on PM with knowledge.
You did not mention my puck-up of sending the box to the wrong address.
Probe has been ridden hard and put up wet and I did not calibrate it so there could be some small percentage error.
Before some jump in this is not a mu-checker. It is a mini-checker.
Above pic shows a reading of 10 millionths undersized.
Bob
Ya, got the units right if not the device name. Interestingly, the readout metal housing does not have a model or type name on it that I could see. It just says “Mitutoyo” and a model number that failed to show up (obsolete I suppose) on a Google search. I tried to find a user’s manual but found none. But the device is dead simple to use and very interesting as it opens up a new order of precision magnitude for me.

I did not include the 12hrs or so drama from reported front door delivery to discovery at neighbor’s house. I was very concerned about porch pirates having lifted it. And oh so relieved when my neighbor walked the box over with a big grin on his face.

Denis
 

johansen

Stainless
Joined
Aug 16, 2014
Location
silverdale wa
I don't have any actual data to add, but I do have a cast iron straight edge I made from a cut off of a machine table of some kind.

It's like a C channel but the flange wraps all the way around the entire perimeter. 20 inches long and 6 inches deep, 5 inches on the inside. The web of the beam is a solid half inch thick so it is rather heavy. Not 0.15 inches like a typical 6" C channel. The flanges are not 100% solid, but about half an inch thick with a good taper, so it's not enough material as to make a dovetail straight edge for anything but a very small machine. The side I scraped is about 1.4 inches wide.

I scraped it to the limit of the diagonals of my 12x18 surface plate. So it's convex on one diagonal and concave on the other.

In 40F equilibrium, if you pick it up by the top flange and hold it for a minute, it will be concave across both diagonals easily.


A lighter weight straight edge with less material in the web of the beam and a longer length to depth ratio will distort faster and further with less temp change.

No one carries around a 6" deep 20 inch straight edge, but I can tell you handling it will move it at least half a thousandth. (In 40f equilibrium). That's a 50f difference from body temperature.. in practice you would wear gloves...
 
Last edited:

Richard King

Diamond
Joined
Jul 12, 2005
Location
Cottage Grove, MN 55016
I was looking at the "Professional Instruments" web-site and found this, "Dave's Tool Tips" under about. . There is also an instrument that measures the air gap expansion on machines. I have the book in my shop, but today their is a Blizzard here, I'm not going to get it. Profsssional Instruments is the parent company of "Air Bearings Inc."
 

IceCzar

Aluminum
Joined
Jul 3, 2022
An interesting thread/experiment which might benefit from more controlled variables.
Heat transfer through conduction being pressure dependent (hand input & other attached thermal mass loss) through convection, flow dependent (airflow at a given temperature differential) and radiation, surface dependent.

As temperature differential doubles so does heat transfer, the granularity of measuring times over the course of gain and loss vs thermal expansion would be challenging. The rate of internal conduction in the sample I'd deduce would also be grain influenced.
 

dgfoster

Diamond
Joined
Jun 14, 2008
Location
Bellingham, WA
An interesting thread/experiment which might benefit from more controlled variables.
Heat transfer through conduction being pressure dependent (hand input & other attached thermal mass loss) through convection, flow dependent (airflow at a given temperature differential) and radiation, surface dependent.

As temperature differential doubles so does heat transfer, the granularity of measuring times over the course of gain and loss vs thermal expansion would be challenging. The rate of internal conduction in the sample I'd deduce would also be grain influenced.
I think those are good points. And trying to tease out the influence of each would be interesting and require considerable effort and rigor.

But, the intent of the thread is not to do the equivalent of a doctoral thesis on the complex issues in play. And equally important was avoidance or, perhaps, general quantification of the oft repeated but unquantified mantras of “thermal disequilibrium (implying always ) causes significant measurement errors.”

I am just trying to “get a handle” (pun intended) on the real world affects of touching a cast iron or steel bar. If that stimulates other folks to do more measurement of heat distortion of straight edges or, alignment tools, and measuring tools in a real world setting, we’d all benefit. There is obviously much more complexity in a camelback distortion than a simple straight bar. . And I intend to look at camelbacks some too. But, it would be great if others provide their measurements and reported them. Especially if their methods as well as measurements are stated. (Repeating aphorisms maybe not so much.).

Denis
 

IceCzar

Aluminum
Joined
Jul 3, 2022
Understood ;)
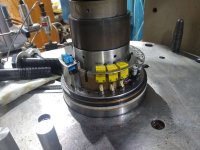
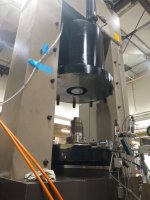
the day job sees me working on various University test equipment
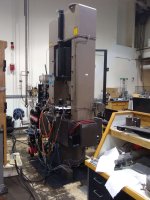
(Pics; a million pound triaxial geomechanics press) that might have "influenced" my comment :p

I guess my main point was that it's going to be the temperature differential in real world settings that is going be the biggest variable.
 

Attachments

  • Compress_20221223_105735_5894.jpg
    Compress_20221223_105735_5894.jpg
    228.1 KB · Views: 20
  • Compress_20221223_110113_3966.jpg
    Compress_20221223_110113_3966.jpg
    180.8 KB · Views: 20
  • Compress_20221223_110115_5086.jpg
    Compress_20221223_110115_5086.jpg
    231.8 KB · Views: 20

CarbideBob

Diamond
Joined
Jan 14, 2007
Location
Flushing/Flint, Michigan
Can you turn charcoal briquettes into diamonds with that thing? Superman did it.
It has the pressure needed but maybe short on heat.
The HPHT method used to make most diamonds in diamond grinding wheels requires about 1 million PSI at a temp around 3000 degrees F.
Originally patented by GE in the 50s. When the patents expired the price of synthetic diamond fell by 80% in 3 months.
Some interesting discussions between the GE diamond guys and the Debeers family in the 60s and 70s.


Top