What's new
What's new

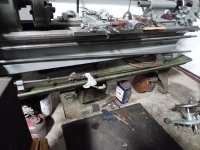
Saved a Hendey from the scrappers yesterday

texasgeartrain

Titanium
Joined
Feb 23, 2016
Location
Houston, TX
Does anyone have any leads/sources for an analog tachometer that I could integrate to this lathe? I don't care how new/old the tech is, wither it's mechanical or electronic, but I'd like to have an old-school needle dial display rather than the new digital readouts that are easy to find.

Two stroke Detroit Diesels use a needle type tach, the gauge in pics is a 3" or 4":

242.JPG 243.JPG

The range is higher than you like at 2500 rpm top end, but I may be able to check if lower options are available. No longer made by Detroit Diesel, but several aftermarket makers. In fact, for you, there is a gauge dealer in Houston that supplies all sorts of stuff to industrial and marine engine dealers in the area. I'll check for the name, but won't know an answer till next week.

The particular maker in the pic is ISSPRO, but VDO and some others make them.

The Detroit style is directional though, prolly not a big deal on lathe, but it only reads one direction, clockwise or counterclockwise. Also cable driven. Cables can be made to length, and there are 90 degree adapters and drives that can do 1:1, 1:1.5 etc. An outfit that can make or get cables is Stanley's Parts in Channelview TX.

Edit* Another possible consideration for tach would be from big bore medium speed engines, like EMD's, top end on those engines are in the area of 900 rpm. More modern will be digital on those, but those engines go way back too, no doubt some needle types available somewhere.

This looks interesting, but don't know if it works or how its hooked up:

244.JPG

From:
 
Last edited:

M.B. Naegle

Titanium
Joined
Feb 7, 2011
Location
Conroe, TX USA
Two stroke Detroit Diesels use a needle type tach, the gauge in pics is a 3" or 4":

View attachment 377810 View attachment 377812

The range is higher than you like at 2500 rpm top end, but I may be able to check if lower options are available. No longer made by Detroit Diesel, but several aftermarket makers. In fact, for you, there is a gauge dealer in Houston that supplies all sorts of stuff to industrial and marine engine dealers in the area. I'll check for the name, but won't know an answer till next week.

The particular maker in the pic is ISSPRO, but VDO and some others make them.

The Detroit style is directional though, prolly not a big deal on lathe, but it only reads one direction, clockwise or counterclockwise. Also cable driven. Cables can be made to length, and there are 90 degree adapters and drives that can do 1:1, 1:1.5 etc. An outfit that can make or get cables is Stanley's Parts in Channelview TX.

Edit* Another possible consideration for tach would be from big bore medium speed engines, like EMD's, top end on those engines are in the area of 900 rpm. More modern will be digital on those, but those engines go way back too, no doubt some needle types available somewhere.

This looks interesting, but don't know if it works or how its hooked up:

View attachment 377813

From:
Thanks for the leads! Something like that brass tach would look perfect on this lathe. Even if the guts were toast, I wouldn't be against using the shell to house the guts from a new tach.

Looking back through this thread, I forgot that the max advertised speed for this lathe was actually 418rpm. So that said, a 500rpm tach would be more useful, if available. Just the same, I want to do the math on the current flat belt drive, and the quoted silent chain drive again before committing to that range.

I'm thinking about integrating the tach into the belt guard assembly, and any sensor or cable connection would adapt to the tail end of the spindle. Since this lathe is reversing, that will need to factor into what tach is used also, even if it just means the tach only registers forward speeds and not reverse. I just don't want a tach that will be damaged in reverse.
 

Greg Menke

Diamond
Joined
Feb 22, 2004
Location
Baltimore, MD, USA
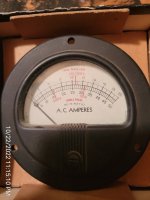
On the topic of gauges, I picked up one of these on a trip a while ago. It has only 2 terminals- If I understand it properly, it measures AC current and if inserted into one leg of a 3 phase system eg my lathe motor, then the legend helps indicate approximate total phase currents (assuming similar loading on each phase), giving a general indication of motor load, which would be cool to have.

But I'm not sure I believe it- I don't understand the three red marks or the 50:5 ratio. On the single phase scale I get the idea that 120v needs twice the amperage of 240 for a given power, but why put the marks there at about 3.7kw or about 5hp? 5hp 3phase is about 17amps at 200v so I think I still don't really understand the red marks.

I <guess> if I hooked it up on one of the 240v motor phases and ran a job on the lathe that brought the motor current up so the needle pointed to 4 then I would infer 4 amps/phase, and calculate approx 1.6kw (2.2hp) in the cut, which would be about right being approx half of the 5hp @ 240v mark. I could then guestimate spindle hp in the cut by the needle's relationship to the 240v single phase 5hp mark- essentially letting me cheat by treating the motor as single phase for the purposes of estimating power dissipation.

If thats true, I'd never see it read over maybe 4amps max since I don't tend to push the machine really hard- just a 3hp motor on it with max current limits set in the VFD- so most of the scale would be unused. Also I'm not sure how much the meter would like the VFD synthesized 3phase.


small-IMG_20221022_231510.jpg
 

4GSR

Diamond
Joined
Jan 25, 2005
Location
Victoria, Texas, USA
Stewart-Warner used to make a handheld tachometer that you placed on the end of the rotating shaft to check the RPM. The one I have gone up to 3600 RPM. I know that is much higher than you need but another source to check out. Rockwell lathe used to supply one of these on the early 14" lathes they built. later discontinued. It had two sheaves, one on the spindle and the other on a jackshaft the tach was mounted to, and a O-Ring as a "vee" belt to turn the tach. Ken
 

texasgeartrain

Titanium
Joined
Feb 23, 2016
Location
Houston, TX
On the topic of gauges, I picked up one of these on a trip a while ago. It has only 2 terminals. . .

Amp gauges are NOT wired directly to hot/live leads, just an fyi for anyone not sure.

They require a CT, which is a circle device, and the lead/wire to be measured passes though the circle. On most 3 phase systems, you would use 3 CT's, one on each hot leg. Two wires from each CT would go to a selector switch. A turn switch with 3 positions. The 3 positions labeled A-B-C, or L1, L2, L3. Then 2 outgoing wires from switch to the gauge. The ratio reading on Greg's gauge I'm pretty sure will be in relation into which type of CT, you would need a matching CT to the gauge.

With that you can read amps on one leg at a time, by selecting which leg to view.

One Greg's particular amp gauge, single or 3 phase seem irrelevant to me, as a single hot leg in a 208-240v is actually the same as the single hot leg of single phase wire, and can be used as such with a Neutral lead.

For my shop I wanted to be able to see volts and amps on the shop, rpc, and each machine. In pic two, I have 3 blue digital read outs. Those read volts/amps of each leg of my 3 phase, without need of a switch. As I run one machine at a time, I can get an idea of load to the machine, and its a quick troubleshooting at a glace if I ever weird volt/amp readings:
Electic Panel Pics from RPC set up

I highly recommend owning a multimeter, fluke preferably, that has an amp clamp incorporated into it. That amp clamp serves as a CT, and is exactly how a regular CT works. With the amp clamp, just open the jaws and let one hot wire inside it at a time, you can not do two hot wires at a time, just one. If a 3 phase system, you AVERAGE the readings of the 3 hot leads for your amp reading.

Edit* CT's are typically directional too, if amps are not reading, flip the CT so the wire passes through the other side.
 
Last edited:

M.B. Naegle

Titanium
Joined
Feb 7, 2011
Location
Conroe, TX USA
In regards to the tachometer requirements, the motor is 1140RPM and the headstock top speed is a 1:1 ratio, so with the current 4" motor pulley and 12" headstock pulley, the drive sees a 3:1 reduction to produce 380RPM. The silent chain drive would see the same 3:1 reduction with a 3" motor sprocket and a 9" headstock sprocket, so same 380RPM. Running the numbers, I could potentially add 1/4" or so to the motor pulley/sprocket and get a little closer to the advertised 418 RPM, but at any rate, a tach that maxes out at 450 or 500RPM would still be ideal.

The low speed isn't ideal for small to medium work that this lathe will see, but just fine for bigger stuff, and even smaller stuff I'm confident it'll do fine with with the right cutter geometry and some patience. I don't think I've ever needed to cut any large diameter hardened parts that would need a higher RPM. I foresee the automatic feed trips getting used a lot as I'll let this lathe take it's time cutting while I run other machines a few steps away.

A low speed analog tachometer seems to be a little tough to find, so I'm going to keep an eye out, but I'm ordering a digital 220v tach for the short term and I'll mount it with plenty or room to open up for a bigger tach casing if something turns up.

On edit: I just had a thought. Most of the electronic tachs I've seen work off a sensor or switch that registers a single RPM, or fraction of one depending on its parameters or programming. But If I set one up with a single pulse per RPM, but put 10 screws or magnets around the diameter that is giving the RPM, I could then use a 5000 rpm tach as a 500rpm tach, with the added benefit of a quicker reading at lower RPM's (instead of waiting for a full revolution to know what the speed is). 10 pulses would be easy to convert too, just adding a decimal point to whatever the display says.
 
Last edited:

M.B. Naegle

Titanium
Joined
Feb 7, 2011
Location
Conroe, TX USA
Stewart-Warner used to make a handheld tachometer that you placed on the end of the rotating shaft to check the RPM. The one I have gone up to 3600 RPM. I know that is much higher than you need but another source to check out. Rockwell lathe used to supply one of these on the early 14" lathes they built. later discontinued. It had two sheaves, one on the spindle and the other on a jackshaft the tach was mounted to, and a O-Ring as a "vee" belt to turn the tach. Ken
I actually have a couple of those and they work in either rotation, but they max out at 4000 RPM with increments of 500RPM, so the resolution won't be very helpful unfortunately.

On edit, one of these SW tachs could potentially work if I add a gear set to the end of the tach table, rather than have it read direct.... I'm going to do some scetching.:scratchchin:
 
Last edited:

ratbldr427

Stainless
Joined
Mar 21, 2006
Location
jacksonville,fl.
Stewart Warner also made some mechanical tachs that I think used a fly ball mechanisim. They should work bi directional. I had a 4:1 that had a small speed reducer/increaser that came with it. I used it with a rev limiter. They went out of favor when all the newer electronic tachs came out ( along with the Sun electric tachs)
 

Greg Menke

Diamond
Joined
Feb 22, 2004
Location
Baltimore, MD, USA
Amp gauges are NOT wired directly to hot/live leads, just an fyi for anyone not sure.

They require a CT, which is a circle device, and the lead/wire to be measured passes though the circle. On most 3 phase systems, you would use 3 CT's, one on each hot leg. Two wires from each CT would go to a selector switch. A turn switch with 3 positions. The 3 positions labeled A-B-C, or L1, L2, L3. Then 2 outgoing wires from switch to the gauge. The ratio reading on Greg's gauge I'm pretty sure will be in relation into which type of CT, you would need a matching CT to the gauge.

With that you can read amps on one leg at a time, by selecting which leg to view.

One Greg's particular amp gauge, single or 3 phase seem irrelevant to me, as a single hot leg in a 208-240v is actually the same as the single hot leg of single phase wire, and can be used as such with a Neutral lead.

For my shop I wanted to be able to see volts and amps on the shop, rpc, and each machine. In pic two, I have 3 blue digital read outs. Those read volts/amps of each leg of my 3 phase, without need of a switch. As I run one machine at a time, I can get an idea of load to the machine, and its a quick troubleshooting at a glace if I ever weird volt/amp readings:
Electic Panel Pics from RPC set up

I highly recommend owning a multimeter, fluke preferably, that has an amp clamp incorporated into it. That amp clamp serves as a CT, and is exactly how a regular CT works. With the amp clamp, just open the jaws and let one hot wire inside it at a time, you can not do two hot wires at a time, just one. If a 3 phase system, you AVERAGE the readings of the 3 hot leads for your amp reading.

Edit* CT's are typically directional too, if amps are not reading, flip the CT so the wire passes through the other side.


Agreed that this is not looking like a series connected meter. I dug out the variac and suicide cord, put this meter in series with my dvm set to measure 20a current and a lightbulb. With the variac turned up so the dvm read .5amps ac, the meter showed 5 on the single-phase scale; so 50:5 aka 10:1 is the ratio of meter reading to current through the terminals, and specifies the CT ratio.
 

M.B. Naegle

Titanium
Joined
Feb 7, 2011
Location
Conroe, TX USA
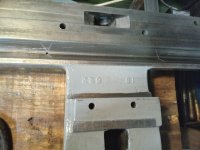
I wrapped up the saddle wings tonight. There's two spots that are still low, but I can work on bringing the rest down to them later, and the saddle wouldn't need to come off, so I'm going to run with it.
20221114_173443.jpg
I went with long and wide scraps as it kinda blends in with the original flaking on the back surface.
20221114_173417.jpg
With those surfaces done, I finished the bed oil holes I had added. I countersunk them so they wouldn't interfere with anything clamping or sliding across them.
20221114_172015.jpg
Underneath, I added some 'x' shaped oil grooves to help get the oil into the bed ways, but that will all get covered and longer better grooves cut later when the bed and under saddle ways get refitted.
20221114_181311.jpg
The front bed clamp was missing, so I made a new one out of steel and added an adjusting screw to set its height with.
20221114_181237.jpg
With this stuff done, I'm making my last passes over the flat ways and the tailstock sides dovetail. Getting closer to dropping the saddle back over the ways!
 

Garwood

Diamond
Joined
Oct 10, 2009
Location
Oregon
RE: Tachometer

My primary business is in vehicle powertrain integration. There isn't a dash gauge from 1915 through modern Canbus that scares me.

If it were mine I would look for an electronic tach or just a housing that looked neat, that you could take apart. Especially a tach that can run off a low voltage tach signal, like an HEI distributor and any modern EFI application would use. Finger out how many pulses it takes to deliver the range on the display. Screenprint a new face for the tach with a 500RPM-ish top speed and mount a sensor ring to the rear of the spindle with the correct number of targets to work with your tach and it's new face.


These are a great sensor for this. They will drive any efi tach directly with a pullup resistor. 3.3K 1/2W resistor works great. The connector is common as dirt metripack you can buy from the same vendor you buy the sensor from. They will run on 12V just like your tach will. They put out a nice clean square wave that a tach sensor will love. Just look at the datasheet for that sensor when you design your targets. You want the valleys wider than the peaks. The GS101201's are out of stock, but they will be available again shortly. This is a crank position sensor and VSS used in thousands of AG and medium and heavy duty truck applications.

If you want to drive an older vehicle tach you can do it with a Dakota Digital universal tach driver, but I'm not a big fan of their products. They are beyond overpriced for what they are.
 

M.B. Naegle

Titanium
Joined
Feb 7, 2011
Location
Conroe, TX USA
OK, I've reached a stopping point with scraping the cross slide ways. It's not perfect, but it feels like I've got tunnel vision with it. There's some small localized low spots and scratches that would be nice to scrape away, but standing back, i'm averaging 20ppi and everything is geometrically square and flat, so moving forward.
20221208_172933.jpg
Saddle's back on the bed. Getting the cross slide and taper attachment back together. Need to make a new shim to go between the cross slide and nut to account for the added height. Also stripping the front of the bed to get it painted, and going to combine the old and new aprons to fix the wear in the feed worm gears. Getting closer to chips!
 

M.B. Naegle

Titanium
Joined
Feb 7, 2011
Location
Conroe, TX USA
So, changing gears (literally) I'm getting the apron/front of the bed back together. My apron had excessive wear in the two feed worms that fit around the lead screw and the worm gears that they drive, as well as a few shafts and the bores they fit into. All things that would not have been as bad if this was the later double wall apron, but I think most of the problem was the classic high-use/low-maintenance story. Everything on the apron worked, but it was very loose and clanky.

I bought the prints from hendeyman to eventually reproduce the gears, then got lucky finding a complete Hendey 16" single wall apron on eBay. I don't know the date of manufacture of the machine that was parted out but got some measurements from the seller and decided to take a gamble. I was apprehensive to see if there was generational differences between the two aprons, but so far they are 90% the same. The new apron is in very good shape compared to mine. My original plan was to use parts from the new apron to make my old apron better, however a couple generational differences are keeping that from happening. For one, the half nuts on the new apron are about 1/8" wider than my old one. I suppose I could trim them down, but the other issue is that the brackets that hold the feed worms don't have the same dowel pin hole pattern (although that's likely not a generational issue, but the fact that they were drilled in situ). The new worms and their brackets are in much better shape, and I had hoped to put the new worms on my old brackets (which are also worn), but they don't want to come apart. So rather than risk damaging something, I checked and the new apron will bolt up to my saddle, so I'm going to clean it up and use my old apron for parts.

Other generational issues is that my old apron had ball top oil holes, while the new one has open oil holes. My old one has two oiling tubes over each worm, while the new one has one oiling tube over each worm. The handwheel and feed knobs are slightly different between them, but interchangeable so I'm putting my old handwheel and knobs on the new apron. There's a couple other changes like sizes of nuts and style of gear hub, but that's the gist of it. It's my assumption that the new apron came from an older 16" Hendey than my 1909 machine, due to things like the oil holes and tubes.

One my old apron, a past owner had modified the feed worm closest to the chuck by removing the dowel pins and elongating the mounting holes, likely to account for wear between the ways and the saddle. I put the dowel pins back in previously before tearing the saddle apart and it didn't seem to bind or lift the saddle close to the chuck. If it does end up being an issue, I think I'd feel more comfortable adding some temporary shims or moglice under the saddle, as I'm afraid repositioning the worm for close to chuck work, would cause issues when working at the other end of the bed. I think eventually I will still need to make new worms, as both the new and old ones have visible wear to the ID where they slide along the lead screw, but It won't do any good until I get the bed and saddle refitted.

A new lead screw would also be on the list too, as mine has a bit of visible wear in the center. The feed clutch rod and the spindle control rod along the front of the lathe also have worn/widened keyways, and I'm thinking these three shafts would be good candidates for cutting keyways on the Whitcomb Plainer when it's running again. I can buy keyed shafting and splice it in the old shaft ends, but plaining the keyways into new CRS shafting might end up cheaper and faster. The lead screw will likely be made by splicing some off-the-shelf acme rod to the old rod ends, then using the plainer to cut the long keyway in it.
 

M.B. Naegle

Titanium
Joined
Feb 7, 2011
Location
Conroe, TX USA
20221213_150043.jpg
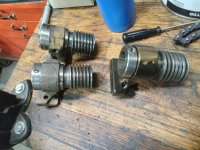
The worm on the right is one of the old sloppy ones. The brazing is a past repair where the bushing broke out of the iron. The other two are the new good ones that just don't want to come apart.
20221213_165007.jpg
20221213_165017.jpg
New apron getting cleaned up and ready for paint.
20221213_165054.jpg
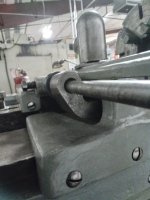
Front of bed cleaned and painted. Please don't judge my unsupported rods!:o
20221213_165126.jpg
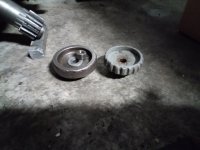
My old feed knobs were knurled (left), and the ones from the new apron are fluted (right).
20221213_165215.jpg
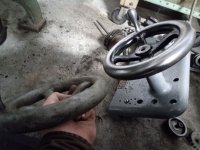
My old handwheel (right) has a shoulder around the front and back perimeters, while the one from the new apron (left) has no shoulder and is one solid ring.
 
Joined
Apr 19, 2006
Location
Manchester, England
You could just make a couple of pieces of wood with vee’s cut in the end to support the shafts. I’ve made pieces of wood with holes drilled in them as supports in the past.
It just looks un-professional I’m afraid. Plus shafts like that, especially leadscrews, can bend easier than you would believe.

Sorry to be judgemental.

Regards Tyrone.
 

M.B. Naegle

Titanium
Joined
Feb 7, 2011
Location
Conroe, TX USA
Agreed I should have propped them up with something. While it's been apart I kept the end bearings loosely assembled, but took them off while painting. The one that is so skewed in the picture is the feed clutch control rod, which only turns maybe 1/4 revolution and has a bit of play on the far left side, letting it droop so much. It's back together anyway. 20221215_155129.jpg
Here's the apron back together with a lot less play. I didn't polish up the pieces as much as I could, but just got all the grime washed off of them before assembling.
20221215_194435.jpg
20221215_194447.jpg
And here it is back in place. I need to trim the bolts down that hold it to the saddle. With the material cut off of the top of the saddle, the bolts are a little proud now. The new half nuts are engaging nicely! I hadn't realized I was missing a detent spring, which was with the new apron, so in addition to having good babbitt in them, they snap in and out well now.

You can see more of the pan is clean and painted now too. I'm doing it in sections while I finish cleaning and painting areas above it. I'll do the bottom of the pan and the legs later once the lathe is earning its keep again. I just wanted to get most of it now before it's oily again. Paints drying on some pieces for the apron mounted spindle control and the taper attachment, so more assembly coming soon.

One other thing I want to do soon, but not now, is block up the left side of the lathe and get the leg out from under it so I can weld some new feet under it where they broke off. They both broke at or right above the foot pads. I plan to make replacements out of mild steel plate that I can then weld up the gaps between them and the iron legs, then bevel the seem and braze them on, or TIG with nickel rod. I'll likely also add some vertical dowel pins between them too. I won't be bolting the lathe down, so I figure if the steel foot pads fully support the iron legs and any leveling shims underneath are evenly placed, there’s not much risk of them breaking off again.
 
Last edited:

M.B. Naegle

Titanium
Joined
Feb 7, 2011
Location
Conroe, TX USA
The front of the lathe is back in one piece, with the exception of the spindle control under the chip pan, which I'm getting pieces cut up and fabricated for. When I had first taken apart the apron end of the spindle control, I found a lot of play in it mostly due to wear in the keyway along its operating rod, but I somehow missed that someone in the lathes past already fixed this buy cutting a new keyway along the opposite side of the shaft. Using that keyway there is very little play in the control's function, so I think it will be fairly responsive.
20221219_120705.jpg
20221219_120728.jpg
20221219_124050.jpg
So now, I just need to fit the cross slide and it's nut together with a new shim, throw the compound back on, and I'll be able to make chips before Christmas!

Concerning the apron spindle control, not sure if I had linked it here but I started another thread awhile back about getting the hardware sorted out for it to function as I wanted:
Spindle Control
Essentially, I want to use the one lever to control both spindle direction and speed. The spindle would be stopped in the middle of the controls rotation, and speed up forward or reverse as you rolled it one way or the other. There would be a couple detents too so there was a tactile stop in the middle. My first step in building this control is going to be making a couple cam plates for two roller limit switches to engage and they will firstly direct the spindle direction to the VFD. Secondly after I'm happy with the physical function of the control, I'll add some relays to the cabinet and add a center tapped potentiometer to the spindle controls shaft, so the limit switches will direct which relay is on, and the relay will direct the VFD to run the spindle forward or reverse, as well as switch which side of the potentiometer is active.
The apron spindle control is the one feature that makes this lathe unique for it's size and age, so it's something I want to fully utilize. In addition to it, I also still want to add a safety switch in the form of a pedal running across the front of the legs, and/or a bar connected to a switch running above/behind the chuck along the ways, similar to how many of these old Hendey's had their clutch control. Another possibility would be to use the apron control only for speed control, making a new dial for it, and then using the old clutch rod design as the spindle direction control via a couple switches. Either way, my goal is to have easy finger-tip spindle control, while also being able to easily and rapidly shut things down if I bump something the wrong way. The VFD takes a second to get the spindle rolling up to speed, which is a good thing.
 
Last edited:

M.B. Naegle

Titanium
Joined
Feb 7, 2011
Location
Conroe, TX USA
I got the cross slide finished tonight. The new shim between it and the nut was about 3/32", while the old one was just under 1/16".
I trimmed about 1/16" off of the underside of the apron to saddle bolt heads to get them shorter than the counterbores. Two bolts were fairly chewed up, but I found a couple better ones in our fasteners that just needed to be shortened. With the apron pulled tight to the saddle, the cross slide gear was fitting too tight, so I added some shims between them and it works better now.
20221219_184449.jpg
With the cross slide dovetails fitted together, I took a little more off the chuck side than I would have wanted. Not a big deal, but some of the flat way is exposed on that side, and the back stop rod still doesn't line up. My solution though was to oversize the hole in the lug that slides along the rod. The rod isn't meant to offer any alignment, it was just a remnant of the original factory alignments. The rod was missing when I got the lathe (likely removed when the slide wore enough), but it'll be a handy feature to use.
20221219_185459.jpg
20221219_185518.jpg
The front stop rod still needs some help. The rod that the Micrometer thimble threads on has messed up threads and I plan on making a new one, but the thread's proving tricky to figure out as it's not fitting any of my profile gauges. More on that later.
20221219_185809.jpg
I'll also need to make a couple new T bolts for the compound as the threads are deformed, but they'll work for now. A couple posts back I mentioned making a donut to print the bottom of the compound, which can be seen here. It's not terrible, but would be good to get better contact with the now flat top of the cross slide.
20221219_185942.jpg


Top