What's new
What's new

RFQ - What am I doing wrong?

Corry

Plastic
Joined
Feb 21, 2011
Location
Fairfax, VA
I have never quoted out a part in my life, so be gentle :). I also am just my own private job shop, so the only RFQ's I've seen are my own :D (small research project) I've probably got something really stupid in this drawing making it so I get no quotes, or no replies. In my RFQ I even specify I'm new at this, and if something looks stupid, talk to me and help me to understand. I get it that most shops are busy now (see the thread with the GBI), so most don't want to take the time to "educate me", but I did figure, for a sinker EDM, this would be an easy job. A bunch of conical divots (seats for conical set screws) and some small holes. I relaxed the tolerances, basically under advice from an EDM dealer, to say I don't need parts run on a CMM afterwards, and I'm asking for more than I need, so if there happens to be a reject in the bunch, I have extras. Any EDM made after about 1995 should be able to hold 0.0002", and the angle tolerances are good for a manual rotary (I think) or a fixture with angles cut in. I figured this would be a "gravy" job (easy, low time, pays well). Only complication would be fixturing, since it is rather long. (Yes, I'm also the idiotic mechanical engineer who designed this stupid thing...there's no way around having this noodle. There are parts with tight tolerances that fit over it to stiffen things up, but I need to assemble moving parts onto it, and this will be a bearing surface once hardened and nitrided). Part is from maraging 300. I have some ground, but not straightened stock. I also bought some new stock to have straightened then ground (since I think that's the order of operations?) I also don't mind a shop quoting the stock, grinding, and straightening, and said so in my RFQ.

If I have to, I'll buy a used sinker EDM. They run about $40,000 (Plus consumables...ick) in my area with the length capacity for the part. Trying to not spend that much, and not really spend 1/4 of that (since at that point, since I expect to break a lot of these, it would be more worth it to buy the machine so I could make more as I break them!). Looking for 20-30 of these...

Thoughts? Takers on the part? Help?!
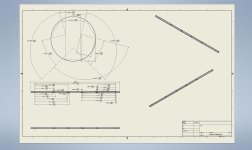
AxleForCollarsNew.jpg
 

BoxcarPete

Stainless
Joined
Nov 30, 2018
Location
Michigan, USA
In my opinion, your drawing is sloppy and confusing. It doesn't take that much effort to do section views, you can do much much better spec'ing out those cone angles, and the and the information you are trying to convey would be much easier to parse if you did something like call out all the hole-hole distances on one view (where you can see the holes go straight through) and all your cone-cone distances on another. You also have some real low hanging fruit like on the left side of the part there are two dimension lines that cross each other, and on the right side they all do. It's just too cluttered.
 

jaguar36

Cast Iron
Joined
May 13, 2015
Location
SE, PA
Your drawing isn't great (Like I spent more than 5 seconds looking and I didn't even see what diameter it is), but I'd guess the issue is the low volume on a small part. How much are you expecting to pay for these? I'd look at the quality of the drawing, look at the quantity and decide it wasn't worth my time quoting it.
 

memphisjed

Stainless
Joined
Jan 21, 2019
Location
Memphis
Call out dimple center to center (60 degrees?).
Loose one iso view and add in bom or at least a piece mark title.
Nothing says what size or material is needed. Does it have to be ground (nothing on drawing to assume either way). How is the scale 1:1 and different front view (located where top view should be) and top view.
It is a busy drawing, section views are your friend.
 

Freedommachine

Hot Rolled
Joined
May 13, 2020
My first question would be; how do I inspect +/- 0.005 degrees?

The drawing would make more sense to me if the anglular position of the cone shaped holes were dimensioned from the centerline of each hole.

Also, at C-6 there are two 0.08" dimensions; what is the 2nd one for?

Call out the holes to be inspected C/L to C/L. Use gd&t to reference datums and tolerances of the features. It makes things much easier to understand, for me at least.
 

BoxcarPete

Stainless
Joined
Nov 30, 2018
Location
Michigan, USA
My first question would be; how do I inspect +/- 0.005 degrees?

The drawing would make more sense to me if the anglular position of the cone shaped holes were dimensioned from the centerline of each hole.

Also, at C-6 there are two 0.08" dimensions; what is the 2nd one for?

Call out the holes to be inspected C/L to C/L. Use gd&t to reference datums and tolerances of the features. It makes things much easier to understand, for me at least.

I think those two .08 dimensions are just rounding error, which is funny to me because everything else on the drawing is spec'd to tenths.

There's also no reference to the ends at all. I wouldn't want to be making a part to tenths and assuming symmetry without at least a centerline to lead me that way.
 

Corry

Plastic
Joined
Feb 21, 2011
Location
Fairfax, VA
I'll try to reply in order here...to keep my reply from being a sloppy as the drawing apparently is :(

Section Views - I'll fix it, but just in case you ever receive something like this, here was my rationale (Just so maybe you can tell the idiot sending out the RFQ whats wrong with them quickly :) ) I included a stp file to have all the non-toleranced dimensions, figuring the 2d would get way too cluttered way too fast. I have no idea what kind of section views are possible with inventor, so having them based on rotation wasn't something I thought of. I looked for guides on making drawings from models, and only found the top left, front views, as well as the isometric view. I thought that was all that was possible and everyone just worked inside those constraints. I thought a stp file would be 100% necessary for clarity. So I learned something already! I'll fix the section views. This is why I started with saying I've never sent out an RFQ before, and probably should have said I've never attempted to make a drawing from a 3d model before.


Diameter - First off, thanks. If that made you comment, it certainly made some no quotes...so I really do appreciate the feedback! Again, here's the incorrect rationale on my part, so again, you can correct an idiot if you get an rfq like this. First, I have material pre-ground. I had thought I was going to make this on my VF-2 with an HRT160 and a bunch of supports....when I actually looked at the tolerances I wanted, I realized tool deflection was going to be an issue. But I had already acquired centerless ground material, 0.0008" undersized, because some test articles grew by 0.0008" after heat treat and nitriding. I did mention it in the email, but left that item out of my post. I'm guessing it doesn't matter. Best to just quote the part as the shop doing everything?

Expect to pay - I'm really not certain, but not $1000 each. I was expecting 20-30 to be between $5k and $10k $166-$333 each. If thats unreasonable, well, I have to adjust my expectations and probably figure out if a used machine makes the most sense for me. I honestly didn't know what to expect though. I was told this wouldn't take a lot of time to make -- less than an hour each. So are EDM's expected to make more than $333/hour? If so I might need to quit my day job and buy a machine!

dimple angle - I could not, for the life of me, get inventor to add it to the point! It just refused! So I added it to the side since its the same thing, 120 degrees. Figured if inventor couldn't do it. everyone was used to seeing it this way. Guess maybe some new sketch likes would make it work? I figured that was making things too cluttered...clearly I don't know what the "right clutter" is and only put in the "wrong clutter"!

add in bom or at least a piece mark title - I don't know what the bill of materials would be...This comment is so confusing to me that it proves I literally know nothing about making drawings for RFQs. Do you mean something like I would provide centerless ground bars and how many? Do you mean the part name and how many? I'm totally lost here. If you don't mind explaining, it would help me out a lot.

Centerless ground - Where would I call that out? It does need to be ground, and as I mentioned in another comment, to 0.0008 undersized so when its nitrided it comes out at size -0.0002" as its a bearing surface, I think slightly undersized is better than even slightly oversized.
Material - This should be in the drawing? I included it in the post, and in my email with the RFQ. Where should it be? Again, yes, I'm clueless as to how to do a proper RFQ/drawing. Up until now I've managed to make everything myself, even with ridiculous accuracy "requirements" (in quotes because I'm the mech-e and the machinist! - so requirements can change based on what I can manage most of the time!)

Additional section view comments. I think I did one as front, one as bottom to try to show the rotation...again, a mistake on my part obviously. I guess one said 1:1? either way, its wrong and needs to be corrected.

Inspect angles - Well, I'd assume a rotary on a CMM, but the point was 0.005 degrees is 15 arc seconds, which I think is what most fixtures would hold, or most rotaries would hold, so no inspection needed...Guess by my logic, I shouldn't have included a tolerance at all...So I'm a hypocrite. dang it... I guess the right question though would be what would you expect to see? No tolerance? I'm not being facetious, I honestly don't know.

C6.....uhhh nothing to see here...But seriously....I have no idea. Like you all have pointed out, its far too cluttered. So much so that I didn't catch something stupid like that...I didn't realize just how bad this was...It all seemed to make sense to me at the time. And yes, likely a rounding error...

Centerline - Yup....You would have assumed correctly about the symmetry, but I didn't realize I needed a centerline to call it out. That should be an easy fix....

My first question is always: how are THEY going to inspect this? - Precisely. I can't. What I will be able to measure is the induced vibrations in the system, which I'm trying to minimize as this is a research device. Vibrations will show as "noise" in the measurements. I'm trying to make this such that my "signal" is rather small, so I have to minimize the "noise" to have a good signal to noise ratio.

+/- 0.0004 - actually, for the 0.080 holes, its more like 0.0002, but a sinker edm that can take steps of 0.00002 should be able to make this +/- 0.0002 all day. The point in calling out EDM and "loose" tolerances for an EDM was to say no inspection should be needed, if its done on an EDM. The holes are alignment pins that affect the "signal" of the device being made. So their location is hugely important. The dimples affect stresses the set screws will make, and if the alignment pins affect the signal, so to will stresses in the axial direction. (tightening down conical set screws will pull the collar one direction or another.) Radial stresses will be bad as well to be honest. I can live with more radial stress than axial stress.

I think that was everyone in order :)
 

RC Mech

Stainless
Joined
Jul 21, 2014
Location
Ontario, Canada
Good for you though. The information density you’re getting is substantial.

I had a P.Eng/MBA insist all I needed to do to quote a mold was pick apart his clusterfuck of a model with 50,000 entities and keep only the molded surface.

Some guys despite credentials have no clue. At least you give a shit.
 

Comatose

Titanium
Joined
Feb 25, 2005
Location
Akron, OH
My rotaries (nikken cncz180) which are considered a pretty decent (mill) rotary is +-20 arc seconds accuracy. A quick glance at edm-specific rotaries suggests accuracy of +-14 arc seconds, or so. Repeatability is better, but the difference between accuracy and repeatability is moot if you can't measure it. And you can't measure it.

Also, where in god's name does that rotary accuracy spec come from? Assuming this is something like a 3/8" shaft, then if your general tolerance required is four tenths, that's .1 degree accuracy. .01 degree is four millionths. .005 degrees is 2 millionths. That's... Not easy.

I won't even go into how offensive the idea is that you are calling out a 2 millionths, unmeasurable feature, then stuffing a set screw into it is.

The drawing is a real mess, but nobody is going to be able to hold 2 millionths across that long skinny bendy bar for a ton of features.

"But wait, I didn't ask for two millionths of an inch precision!" You say. But you did, because the only reason that the angles would be THAT important is if you are using this to clock some sort of mechanism. For that application, if the hole is positionally in the wrong spot, that is just as bad as being rotationally in the wrong spot.

So your worst tolerance isn't +-.0004, it is +-.000002.

Which is a hell of a set screw.
 

Corry

Plastic
Joined
Feb 21, 2011
Location
Fairfax, VA
My rotaries (nikken cncz180) which are considered a pretty decent (mill) rotary is +-20 arc seconds accuracy. A quick glance at edm-specific rotaries suggests accuracy of +-14 arc seconds, or so. Repeatability is better, but the difference between accuracy and repeatability is moot if you can't measure it. And you can't measure it.

Also, where in god's name does that rotary accuracy spec come from? Assuming this is something like a 3/8" shaft, then if your general tolerance required is four tenths, that's .1 degree accuracy. .01 degree is four millionths. .005 degrees is 2 millionths. That's... Not easy.

I won't even go into how offensive the idea is that you are calling out a 2 millionths, unmeasurable feature, then stuffing a set screw into it is.

The drawing is a real mess, but nobody is going to be able to hold 2 millionths across that long skinny bendy bar for a ton of features.

"But wait, I didn't ask for two millionths of an inch precision!" You say. But you did, because the only reason that the angles would be THAT important is if you are using this to clock some sort of mechanism. For that application, if the hole is positionally in the wrong spot, that is just as bad as being rotationally in the wrong spot.

So your worst tolerance isn't +-.0004, it is +-.000002.

Which is a hell of a set screw.
I actually hadn't done the positional accuracy calculations. You asked where the tolerance came from, so here it is :) I talked to a few EDM dealers before I even considered sending this out for someone else to do. Actually, it was the EDM dealers who convinced me to send out RFQs, so I had no reason to not trust them. Several told me there were $500 rotaries that could manage that tolerance. So I took them at their word. So the tolerance was supposed to read like this, "Do what the machine can do, don't bother inspecting. Everything will be fine". I guess that's not quite the case, but as you said, EDM rotaries are 14 arc seconds, so maybe he was severely exaggerating about the $500 cost. For fun, I decided to check what Haas specs for the HRT160 I have. Its not good for EDM, but worth a check. https://www.haascnc.com/machines/rotaries-indexers/rotary-tables/models/hrt160.html +/- 15 arc seconds accuracy +/- 10 arc seconds repeatablility, 30 arcseconds of backlash. I at least think, everything in the EDM world is more accurate, so +/- 15 arc seconds shouldn't be unreasonable. That said, as you pointed out, I don't need +/-0.00002" precision for set screws. Conical or not. I think the real takeaway for me from your comment is that people don't know their machine specs off the top of their heads (Obviously I didn't, I had to look up the HRT160), so it would be ridiculous for me to assume everyone else did too. I should not be lazy, do the math, and figure out what I actually need.


Oh, and the part diameter is .2354" 0.0008" under 6mm. I do have a bad habit of mixing measuring systems. Metric bearings seem to be easier to source and seem to come in wider varieties. I grew up with the good old imperial system and its still how I think. However, getting a stroke rotary bearing in .25" for even close to a reasonable price isn't possible. On just the few that I needed I ended up spending $8k already, and that was for metric! .25" would have probably cost me double or triple that!
 

Comatose

Titanium
Joined
Feb 25, 2005
Location
Akron, OH
That's actually not my point, so I'll try again: on the drawing, you are calling out a position via only angular measurements. The angle tolerance suggests a very, very, VERY tight positional tolerance.

For next time, if you want to spec a "just take a stab at it, it's fine" sort of tolerance, call it out as 10x the nameplate accuracy of the machine or more. Accuracy is a stackup. So, first you have the accuracy of the machine's motion system. That's a tenth, or 15 arc seconds, or whatever. That's always when the tool is new, not 10 years later. Then you have the accuracy of the workholding on top of that. Let's say that's half a thou. Then you have variations in the workpiece, the tool size, thermal growth, tool erosion, runout, etc. It all gets worse, never better, as it stacks up, if what you're looking for is "press go and don't check" level of effort.


I mix metric and imperial all the time in designs. That's just how it goes when you're working with components from all over the world while in the USA. You've got 99 problems with this RFQ, but that isn't one.
 

in2glamisgirl

Aluminum
Joined
Jun 20, 2006
Location
Hawthorne, CA USA
That part will change in length about .001 in. for every 10° F
Most job shops like to tolerances in three digits not four, +/- .5° is common for small angles.
With your tight dimensions this part is better suited for gauge shop/ tool-die shop.
 

Corry

Plastic
Joined
Feb 21, 2011
Location
Fairfax, VA
I do get the accuracy stackup as I've done a fair bit of milling and turning. It seems every part I designed had at least one feature I needed to hold a couple of tenths on. In many cases, I had to buy accurate measuring equipment. One part nearly caused me to buy a CMM...In fact, I bought an optical CMM....but I don't quite have it working yet. Tesa can't find me a part number for its zoom cable, so I'm probably going to have to make a new one! Since I was never able to get that part perfect, I made it to an interference fit. I don't like the stress buildup, and I made it as loose of an interference fit as I possibly could, but it's a noted defect. But that's a large digression from the topic of my shitty drawing/rfq :D

I do get that machines wear...which is why I bought my mill and lathe new. I would think EDM would be harder to wear out, and most I saw had glass scales, so their position will be accurate...so its just a matter of how much wobble is there in the ways. The lack of tool pressure would seem to make wearing them out difficult, but, I suppose always running a heavy tool on the head and heavy parts on the bed could cause it to wear quickly. I guess I don't know what sort of work most EDM shops get, but I'd have thought it would vary a lot, not all on heavy work, so I'd think the machines wouldn't be, as AvE put it, clapped out. I suppose if I go the used machine route, I'll have to keep that in mind...checking the ways for play....if that's even possible.

As for the next reply, for steel expansion that growth is only in the 14" direction which has loose tolerances already - 0.04", I should probably set it at +/- 0.125 though...and stick to one tolerance form...I swear some idiot must have made that drawing....:D, but I should set it up that high just to be clear I don't care about the overall length as long as its symmetric about the centerline as was pointed out in an earlier reply. Unfortunately, I don't know of any tool and die shops or gauge shops. If you have someone you use, I'm all ears :) I'll try to fix the drawing up though with what people have said to do on here :) edit: hmmm but features will move too....have to think about that...

Honestly, if I have to do this myself, I'll just be looking for a low burn hours EDM with glass scales and trusting the machine accuracy and machine probing (It's supposed to be quite good on EDM machines). So honestly that's all I'm really looking for.
 
Last edited:

Corry

Plastic
Joined
Feb 21, 2011
Location
Fairfax, VA
I should note though, with these "relaxed" tolerances, I had many places come back and try to claim they could justt make this with a swiss machine....so it seems I'm damned if I do, damned if I don't on the tolerances. Spec it too high they're going to want to measure everything on a CMM. Too low and they're already trying to make this on a turning center. Any suggestions there?!
 

newtonsapple

Hot Rolled
Joined
May 16, 2017
I haven't fully digested this part.

However, given the I need it pretty tight, but don't really know what I need approach, I think this can be done on a CNC swiss setup. Most shops with be setup to run 6mm stock, and the setup is a few drills. Should be cheap to run that way. Trick is finding a shop that wants to kick out 30 pieces.
 

newtonsapple

Hot Rolled
Joined
May 16, 2017
I should note though, with these "relaxed" tolerances, I had many places come back and try to claim they could justt make this with a swiss machine....so it seems I'm damned if I do, damned if I don't on the tolerances. Spec it too high they're going to want to measure everything on a CMM. Too low and they're already trying to make this on a turning center. Any suggestions there?!
Uhhh, why not make it on a swiss??

Do your set screws incorporate a linear bearing section or are you just relying on the threads to locate them? If it is just the threads, I can't imagine a swiss produced part would be the problematic one.

Edit: I don't understand what you are doing with the screws. Are you using them to locate a collar about the shaft??

OP wrote:
"The holes are alignment pins that affect the "signal" of the device being made. So their location is hugely important. The dimples affect stresses the set screws will make, and if the alignment pins affect the signal, so to will stresses in the axial direction. (tightening down conical set screws will pull the collar one direction or another.) Radial stresses will be bad as well to be honest. I can live with more radial stress than axial stress."
 
Last edited:

Comatose

Titanium
Joined
Feb 25, 2005
Location
Akron, OH
As for the next reply, for steel expansion that growth is only in the 14" direction which has loose tolerances already - 0.04", I should probably set it at +/- 0.125 though...and stick to one tolerance form...I swear some idiot must have made that drawing....:D, but I should set it up that high just to be clear I don't care about the overall length as long as its symmetric about the centerline as was pointed out in an earlier reply.
Erm, no...

The thermal growth doesn't just impact the overall length. It also impacts everything... along... the length, all of which are toleranced +-.0004.
 

john.k

Diamond
Joined
Dec 21, 2012
Location
Brisbane Qld Australia
No wonder no quotes.............how exactly are setscrews going to be fixed to some crazy degree of accuracy.......is the setscrew thread fit accurate to millionths ,and the point concentric to the same limit .
 

Seesecurity

Plastic
Joined
Jun 20, 2017
I would imagine they would have to get to superfinishing levels on the edm just so the surface finish didn't put the part out of as drawn tolerance ...


Top