Ballistic42
Plastic
- Joined
- Nov 8, 2020
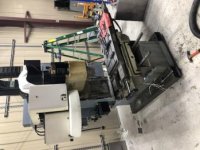
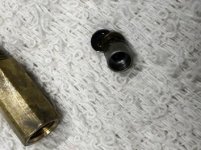
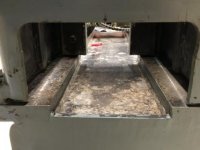
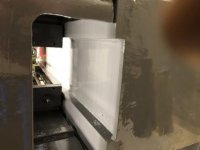
I have bought a 1998 FADAL VMC15 XT that I thought was in good shape but to my surprise it was not. I knew that I was going to take the enclosure off and powder coat every part to make it look like new including redoing the pendant with a new LCD monitor. This machine is a 3 axis machine and not prewired for a 4th axis. To be clear, I over paid for the machine by about $2000 but what a learning experience. After taking the machine apart I found out a lot. After taking off the Z way cover and looking at the Z trucks I noticed they were very dirty I mean had so much crap on them old dried coolant and lots of brass chips on them. One of the Z trucks (left lower) wiper cover was popped out. I took the cover off to inspect and there it was, the start of a nightmare!!! The Z truck internal was cracked and the balls started coming out. So now I have a decision to make what to do? After talking to many shops and FADAL part suppliers I found out the you can replace just one rail but no one had ever done this. A couple of shops said you can probably take the bad side off and slide in the new one. Very tricky and you have to move the head up and down in order to gain access to all the rail bolts.
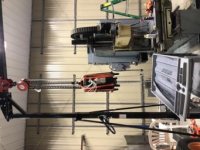
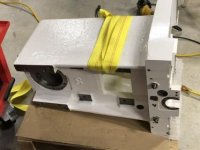
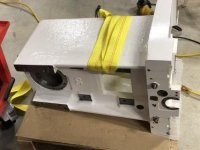
I said skip all that not going to do that as I will just take the motor off, pull the spindle, powder coat the head and put 2 new Z rails on. So that's what I did (pictures to follow). I had to buy a 2000lb Northern Tool gantry with chain fall to do all this work. I had done some reading on the Baldor spindle motor and mine was not looking so good. I decided to take the motor to a rebuild shop and the motor would not ohm out, way low. Well as they took the motor apart they said it would need to be rewound (after cleaning it). The long and the short of it had to buy a new motor! I just could not rewind a piece of crap better to buy new. Oh it gets better. The previous owners did not adjust the motor correctly and let the belt ride low and grooved both the spindle pulley and the motor pulley. Well those pulleys are not cheap. For both new pulleys I have about $900 in them! You can not just go buy a pulley from anywhere as they are propriety to FADAL! FADAL had a company I think in the CHATSWORTH, CA area build them but don't quote me on that. Well I took it all apart and thought dang what should I do with the spindle now? Should I rebuild the spindle or just clean it up and run it. Knowing how much work I am putting into the machine I decided that I will just buy a new one from one of the FADAL parts supplier. I just can't allow myself to try to put this old one back in knowing the shape the other parts of the mill were in. Took all the Ballscrews out and sending those out to have rebuilt for $500.00 each axis includes shipping.
I have to put the new Z rails on to the Z frame of the machine which is not a 20 minute job as they have to be perfectly placed or the head just wont ever be square to the table. For those who have never done this on this type of machine let me tell you a few things. First off taking the head off was not to bad with the gantry. You have to get an allen wrench up behind the head to take the bolts out of the Z trucks. Took some time for sure about an hour and half. So the head is off and now I had to think how to get it back on. Well very interesting you have to take the head off you have to PIN the counter weight very important!!! So after I pinned the counter weight I unhooked the chain, took off the counter weight rails and sprockets. The sprocket bearings were shot so I bought a new chain set from ITSFADAL parts. I powder coated the counter weight sprocket rails in a gloss gray so they look nice, wont rust and easy to keep clean.
Ok how do you get the head back onto the Z rails? Looking at the Z column I noticed holes in the top part. Those holes are so that you can tighten the head to the Z trucks by sticking a ratchet with an extension through those holes. You have to go into the center of the column where the counter weight is. Well that's all good but you have a 750lb lead weight inside the column that is pinned blocking those holes! Well time to pull the counter weight out with the Gantry. Came out like butter no problem with the right tools. I spent a month cleaning parts on this machine no kidding a month. I got every chip out and wiped and sanded the frame down to bare metal. I wiped the frame down with oil and grease remover to prep for paint. I researched what type of paint to use and I found one thing, everyone has different ideas! The one common thread is DON'T USE EMERON UNLESS YOU HAVE GREAT VENTILATION AS THAT STUFF WILL MAKE YOU HAVE SOME BAD BAD PROBLEMS IF IT GETS INTO YOUR LUNGS!!! I opted to use POR15 gray gloss. I put 4 coats on and it came out great and it dries so hard a cat could not scratch it. I used a foam brushes to apply it. Just follow the directions on the can. I used all of 2 pints on the frame only. I even painted the inside of the column where the counter weight goes.
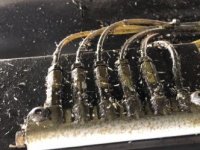
During all this going on I have rebuilt the ATC. I bought all new CAT40 Tool holders, new bearings in the ATC plates, new romex connectors on all cables and cleaned and painted the ATC motors. wiped out every square inch of the electrical panels and wires. I replaced all the fans and filters. The cabinets look like new on the inside, very clean. Now to the Bijur PDI lube system. Ok that reservoir was a dirty thing no doubt. I took it apart rebuilt it with new hose, fittings, solenoid, and pump. It was still cheaper to buy all the parts than a new one but if time is an issue buy a new one. IF you need BIJUR parts go to www.motionsource1.com. Chip and Jim have all the parts to put your FADAL mill back to like new condition and you won't find a better price!!! Let me give you an example. My VMC15 injectors are .06cc, they cost $28.00 to $31.00 a piece new. You can rebuild the injector with new O rings and cup seal for about $2.50 a piece. I went as far as to polish mine (BRASS) and put the new parts in the injectors and they are like new now. I am not going to throw the price out there but I can tell you if you replace the whole BIJURE PDI pump through motionsource1 you are going to save a ton of money. I already bought the parts to rebuild my PDI but knowing what I know now I would of just bought the new PDI pump from motionsource1. My PDI box was rusted on the outside so I just dropped it off to the powder coater to let them work their magic. The air system on the mill had seen better days so I got on the interweb and found all the original parts that came on the machine. You can goto one of the 4 main FADAL parts suppliers to buy the parts but your going to be a whole lot lighter in the wallet. Don't get me wrong I have spent a ton of money with all of them in the rebuild process and have passed the love around but when I could I sourced else where. I bought all new air system parts, hose, fittings, clamps, brass filters, and dual regulators with gauges for the cost of the dual regulator from one of the FADAL parts houses. Don't get me wrong the parts houses have to make money to but I have spent enough with all of them.
I still have to assemble the machine. I have to put the rails on, get it in place and square to the table. After that I have to put the head on adjust the trucks square those up to the table, block the head, put the counter weight back in, setup counter weight chain to head, mount spindle motor, put spindle in head, put orientation plate back on, and then will be ready to pull the table to put all new oil lines on and clean and paint the table. This project is a ton of work but I will have a badass new machine when done and will know the machine like the back of my hand. I am going to show pics as I get them uploaded. The ATC and the spindle head cover is going to be orange illusion powdercoat and the enclosure will be bright gloss white. I will have the FADAL VMC15 XT in a wrap on the spindle cover and the ATC. The orange color sounds crazy but wow it looks awesome! Just thought I would share my experience with everyone as to what I have gone through and found out on this project.
Jeff


